Getting Started
This guide walks you through everything you need to know to use AutoButler day-to-day. No technical knowledge required.
Accessing AutoButler
Once AutoButler is set up on your home network, you can reach it from any device on your WiFi:
- Open a browser on your phone, tablet, or computer
- Go to
http://autobutler.home.local(or whatever hostname your device was given during setup) - Log in with your username and password
Tip: Bookmark the address so you don't have to type it every time.
If you can't reach the address, make sure the device running AutoButler is powered on and connected to the same WiFi network you're on. AutoButler only works on your local network — this is by design to keep your files private.
Cirrus — Your Files
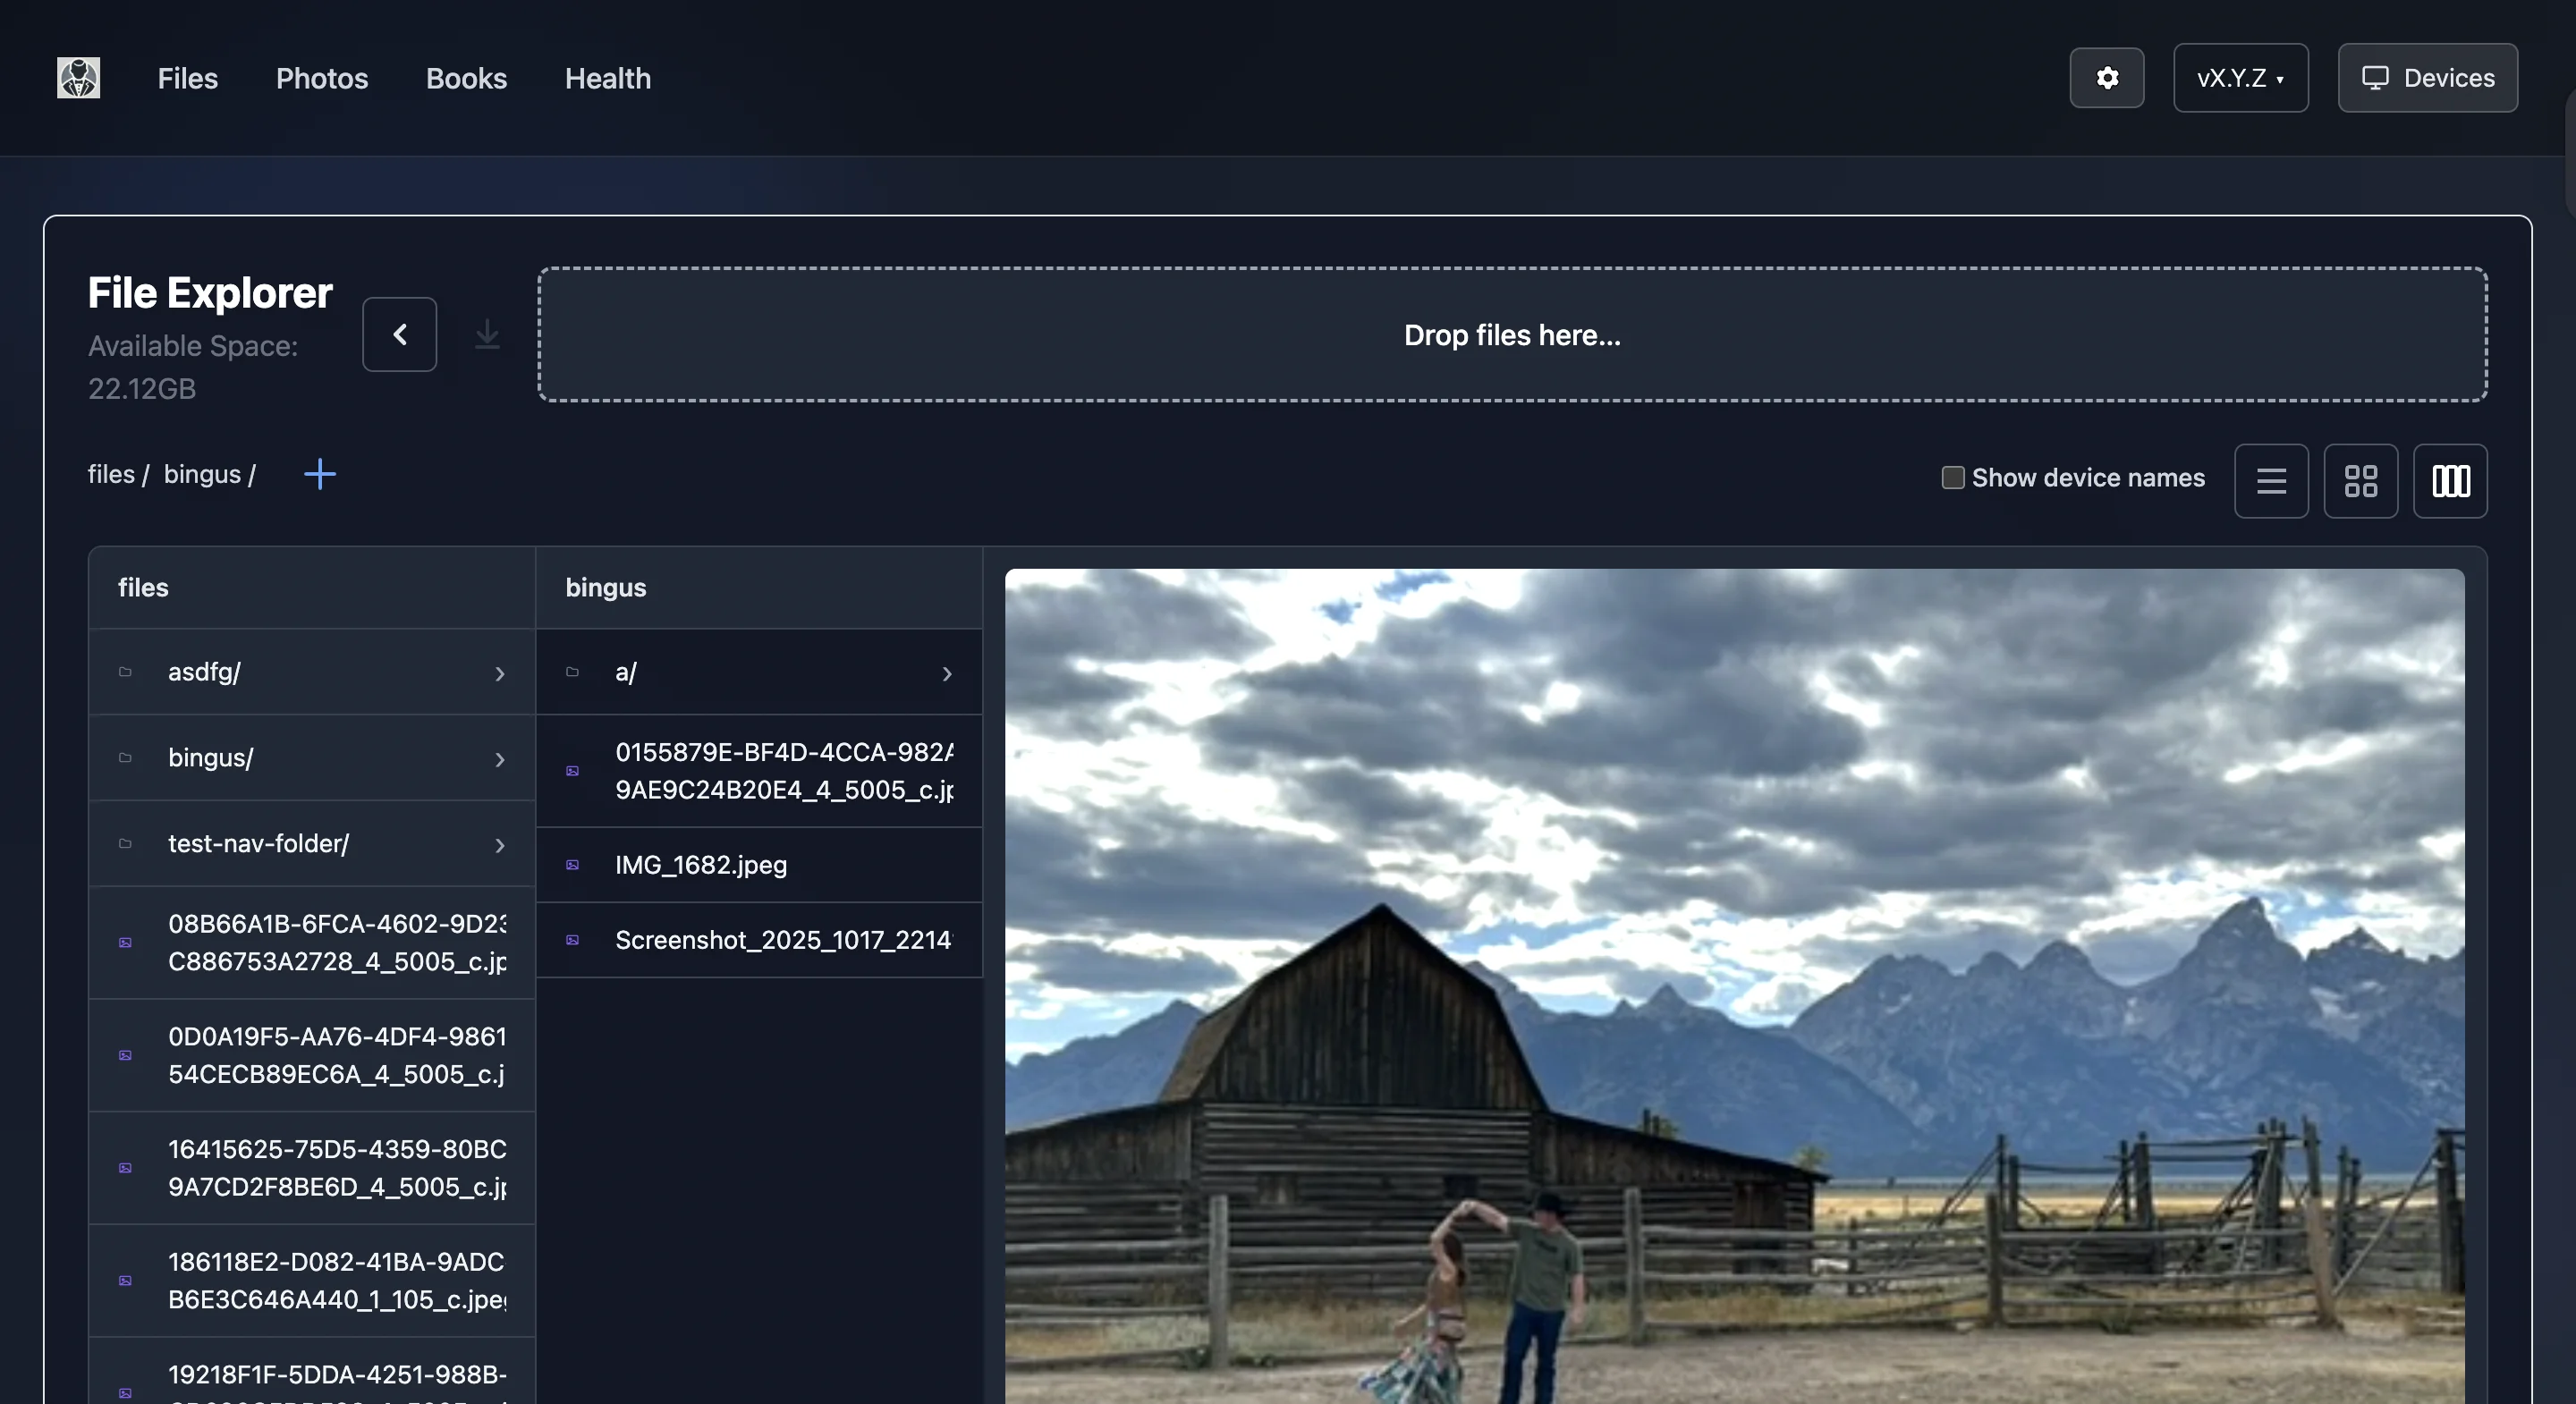
Cirrus is the file browser. Think of it like a Google Drive or iCloud interface, except everything lives on your hardware at home.
Browsing your files
When you open Cirrus you'll see your files and folders listed. You can:
- Click a folder to open it
- Click a file to download or preview it (images and common file types open in a viewer)
- Use the breadcrumb bar at the top to navigate back up the folder tree
- Click the home icon in the breadcrumb to jump back to the root
Changing the view
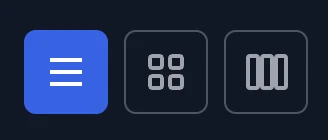
Cirrus has three layouts — pick whichever works best for what you're doing:
- List — a compact row-by-row view, good for lots of files
- Grid — larger thumbnails, good for photos
- Unified / Per-device — toggle between seeing all your storage devices as one combined view, or seeing each device separately
Searching for a file
Click the search icon in the top bar and type a filename. Cirrus will search across all your connected storage.
Uploading Files
To add files to your AutoButler:
- Navigate to the folder you want to upload into
- Click the Upload button in the top bar
- Choose your files from your device
- Wait for the upload to complete — a progress indicator will show you how it's going
You can upload multiple files at once. Large files may take a moment depending on your home network speed.
Creating Folders
- Navigate to where you want the new folder
- Click the New button in the top bar
- Type a name and confirm
Moving and Renaming Files
Right-click (or long-press on mobile) any file or folder to open the action menu. From there you can:
- Rename — change the name
- Move — move it to a different folder or storage device
- Delete — remove it permanently
Note: Deleting files is permanent. There is no recycle bin.
Storage Devices
AutoButler can manage multiple storage devices (hard drives, USB drives) connected to your butler device. If you have more than one:
- Use the Unified view to see everything in one place
- Use the Per-device view to see what's on each drive separately
- When uploading, you may be prompted to choose which device to upload to
Photos
The Photos section shows your images organized by time. You can browse, view, and download your photos from here. Photos works best when your images are stored in a dedicated photos folder on your storage device.
Health
The Health page shows you how your AutoButler is doing:
- Disk usage — how much storage space is used vs. available
- Temperature — the device's current temperature (important for small devices like a Raspberry Pi)
- Uptime — how long the device has been running
If anything looks off (disk nearly full, temperature very high), this is where you'll see it first.
Settings
The Settings page lets you:
- Toggle automatic updates — turn on to have AutoButler update itself overnight when a new version is available; turn off if you want to control updates manually
- Export performance metrics — saves recent health data to a file you can share if you're troubleshooting with the team
Logging Out
Click your username or the settings icon and choose Log out when you're done. This is good practice on shared devices.
Next Steps
- Help & Support — troubleshooting and how to get in touch
- Nerd Notes — technical details for self-hosters and tinkerers